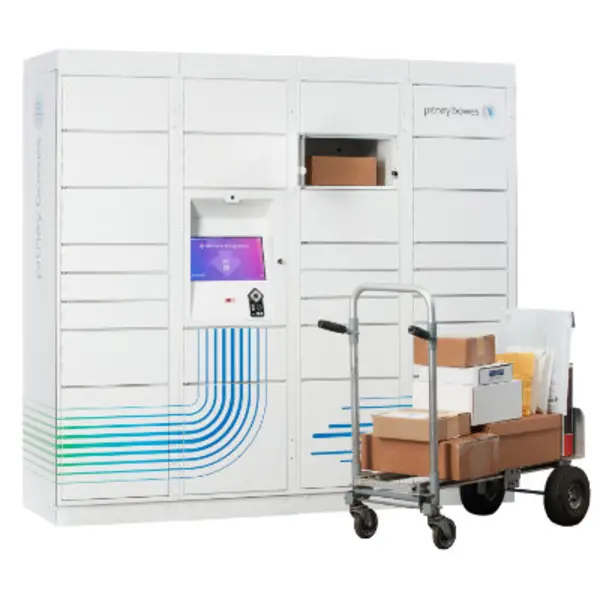
ParcelPoint™ Smart Lockers Support
Find solutions
Network & Connectivity
The following URLs and IP addresses must be accessible in order for PitneyShip Pro, PitneyTrack Inbound, PitneyAnalytics, and the Locker Management Module to connect to the internet.
Features & Settings
You can add accessibility requirements to contacts in your address book. The system will automatically select an accessible locker when you reserve a locker for that client in ParcelPoint™ Smart Lockers.
You can import a CSV file of your users.
You can edit users if you need to change their name, role, or permissions.
Administrators can edit custom fields as needed.
You can view all of the users in the system or search for individual users or groups of users.
You can export a .csv file of your users.
You can export your divisions and locations from PitneyShip Pro, PitneyTrack Inbound, PitneyAnalytics and the Locker Management Module in CSV format.
You can add up to 10 custom fields to several different screens in the system.
If you no longer need a role, you can delete it.
If you no longer need a location, you can delete it.
Locations are subsets of divisions, which are subdivisions of your enterprise. Each division can contain multiple locations.
You can update the recipients in a department or change the key contact.
If a user account is no longer needed, you can delete it.
If you no longer need a department in the system, you can delete it.
If you are going to use Single Sign-On (SSO) for the Pitney Bowes PitneyShip Pro, PitneyTrack Inbound, PitneyAnalytics, and the Locker Management Module, you need to configure your Identity Provider (IdP) according to our guidelines.
You can change the name of a division if needed.
You can change the name of a location if needed.
You can import locations into using a CSV template that you can download.
Enterprise administrators can set the period of time after which users will be signed out of the system if they are not using it. This setting applies to all users.
If you need to change a role, you can edit it.
Divisions are subsets of your enterprise, which is the topmost level of your organization. Each division can contain multiple locations within it.
You can send customized notifications to inform users when certain events occur.
You can add users to the system as needed.
You can change the system language between English and French.
You can create different roles to define the tasks that users are allowed to perform. Each user is assigned a role.
If you no longer need a division, you can delete it.
If you use the employee ID field, you can choose to make it required when adding users to the system.
If you do not know your password, you can reset it.
If you do not receive the Welcome email, you can go to the signin page and use the "Forgot your password?" link to reset your password.
You need to sign in in order to use the system.
You can export contacts from the address book in CSV format.
You can import contacts into the system by uploading a CSV file.
If you no longer need a contact in the system, you can delete it.
If you have a lot of contacts in your address book, you may need to use the search feature to find the one you want.
You can edit contact information as needed.
You can add new contacts to the address book.
You can import contacts into the system automatically on a fixed schedule from an SFTP server.
A department is a group of recipients for whom packages can be received and delivered. Each department can have a "key contact" who receives or picks up the department's packages when used with PitneyTrack Inbound and the Locker Management Module.
Enabling accessibility for locker recipients in PitneyTrack Inbound and the Locker Management Module
Accessibility is configured at the recipient level. Enabling accessibility for a recipient ensures that locker assignments will meet ADA height compliance standards (no doors higher than 48 inches or lower than 15 inches from the ground), as well as no interactive touchpoints.
Receiving
You can free up lockers for additional reservations and drop-offs by ending existing reservations.
You can view the lockers according to their status by tapping on the appropriate color-coded option at the top of the manage locker screen.
ParcelPoint Smart Lockers are equipped with an audio assistive interface for visually-impaired clients. The interface works with any set of earphones with a 3.5 inch plug.
You can add accessibility requirements to contacts in your address book. The system will automatically select an accessible locker when you reserve a locker for that client in ParcelPoint™ Smart Lockers.
If your site lets you set the duration of your reservation, you can log in to extend your reservation and add more time in ParcelPoint Smart Lockers for Workplace Day Use
You can set up how clients interact with the lockers when dropping off packages.
You can configure your locker bank to accept direct carrier delivery by adding a role and printing QR codes for carriers to use.
You can configure your locker bank to accept direct carrier delivery by adding a role and printing QR codes for carriers to use.
You can view and export locker activity filtered by transaction type and date range.
Instead of a typing in a user name and password, users can scan a barcode to log into a locker bank. You must enable Contactless Lockers in the settings for each locker bank you want to be contactless.
To enable users to use the ParcelPoint Mobile App, share your Authorization Code, support contact information, and a download link with your organization's members.
Customize the look and feel of your locker bank screen and mobile app with Branding.
You can configure how clients interact with the lockers when they pick up packages.
You can configure how clients interact with the lockers.
You can set up lockers to allow clients to store personal belongings for either a fixed duration that you set, a flexible duration that clients can set within the maximum limit you define, or no end time. Additionally, you can reserve certain lockers of each size exclusively for delivery, ensuring that all available lockers are not occupied for personal storage.
Each rear loading locker shelf must have a barcode. Use Configure Lockers to generate the barcodes.
You can choose an available locker and store your belongings in the Locker Management Module for a fixed amount of time, or for a duration you set if that option is allowed at your kiosk.
To ensure an assigned locker is ready for you to store your belongings, reserve it in advance using the web application. You have the flexibility to reserve a locker for a fixed amount of time or for a duration you set, provided that option is available at your kiosk in ParcelPoint Smart Lockers for Workplace Day Use.
You can open the locker door while your reservation is active to retrieve belongings or add more to the locker in ParcelPoint Smart Lockers for Workplace Day Use.
Retrieve your belongings at the end of the day and end your locker reservation in ParcelPoint Smart Lockers for Workplace Day Use.
You perform administrative functions by logging in as a mail room administrator.
As mailroom administrator or locker operator, you can reserve a locker ahead of time using so that an assigned locker is available for a specific package as soon as you or a designated client sign in at the kiosk.
As mailroom administrator or locker operator, you can reserve a locker for a package return.
As mailroom administrator or locker operator, you can reserve a locker for a package exchange in the Locker Management Module.
As mailroom administrator or locker operator, you can reserve a locker ahead of time so that an assigned locker is available for a specific package as soon as you or a designated client sign in at the kiosk.
If a locker is dedicated to a department or an individual recipient, you can reserve a locker ahead of time so that an assigned locker is available for a specific package as soon as you or a designated client sign in at the kiosk.
If the recipient already has lockers with packages in them, you can add more packages to those lockers.
The mailroom administrator can set you up so that you can pickup both personal packages or departmental packages at the kiosk.
You can use the Locker Management Module to see which lockers are available, reserved, occupied, expired, and out of service.
You can pick up multiple packages from all the lockers assigned to you by opening one locker at a time.
You can pick up multiple packages from all the lockers assigned to you by opening all of the lockers at the same time.
You can pick up a package once you receive an email that it is ready for pickup.
You can still drop off a package if the barcode is damaged or otherwise unavailable.
You can receive a package in PitneyTrack without reserving a locker, then scan the tracking label at the kiosk with the optional handheld scanner.
You can choose an available locker and add a recipient's package to that locker directly at the kiosk.
As the mailroom administrator, you can reserve a locker ahead of time so that an assigned locker is available for a specific package as soon as you sign in at the kiosk
If you need to reopen a locker for any reason, the kiosk system allows you to reopen the locker as long as you do it within a certain time period after closing the locker.
You can disable the ability to add packages to an existing reservation if you have security requirements that a locker not be opened by anyone but the recipient.
You can remove expired packages to provide additional locker space for new package drop-offs.
You can view the package and locker details for all of the locker banks available to you. These include the recipient name, locker bank location, tracking ID, and status.
If a locker is currently out of service, you can place it back in service to make it available for reservation and drop-off.
You can remove a locker from service so that it is no longer available for reservation.
If a recipient is unable to open a locker door, you can open it using the Locker Management Module.
Network & Connectivity
The following URLs and IP addresses must be accessible in order for PitneyShip Pro, PitneyTrack Inbound, PitneyAnalytics, and the Locker Management Module to connect to the internet.
Errors & Troubleshooting
If the "Do not challenge me on this device again" option is not working or you get MFA prompts happening too often, you may need to adjust your browser settings.
If the message "Duplicate Personnel ID" occurs when importing contacts, the PersonnelID values the CSV import file are not unique.
The message "That address doesn't exist. Error 404" when accessing the Address Book mesans that you do not have permission to access the Address Book.
The message "This user account is locked. Too many unsuccessful login attempts." occurs after too many unsuccessful login attempts.
If the authentication email is not received, the email may be in your Spam or Junk folder, or your network may be blocking these email communications.
If you are not receiving email notifications from PitneyShip Pro, PitneyTrack Inbound, PitneyAnalytics, and the Locker Management Module, the feature may not be set up, or the emails may be being blocked.
Documents and Software
For information on service offerings and level of support, download the
Pitney Bowes Technical Support Overview