Integrating with Siebel Non-SDQ
To integrate Spectrum™ Technology Platform with Siebel Non-SDQ, you need to install supporting databases and dataflows on the Spectrum™ Technology Platform server, and then configure your Siebel system to communicate with Spectrum™ Technology Platform. Once you do this, users of Siebel Non-SDQ will have access to address validation and geocoding functionality from within Siebel Non-SDQ.
-
On the Spectrum™ Technology Platform server, install
the databases required to perform address validation, geocoding, and tax
jurisdiction assignment and define database resources for each database.
You must give the database resources the following names.
Database Required Name for Database Resource Enterprise Geocoding Module - Canada Database IGEO_CAN Enterprise Geocoding Module - U.S. Database EGM_US Enterprise Tax Module Database ETM Universal Addressing Module - Canada Database Canada Universal Addressing Module - Loqate Database Loqate Universal Addressing Module - U.S. Database UAM_US -
When you install the Siebel module, several dataflow
files are automatically installed. Other dataflow files must be manually copied
into the Spectrum™ Technology Platform server.
-
Browse to one of the following folders on your Spectrum™ Technology Platform server:
- For Siebel Business Applications, go to: <SpectrumPlatformLocation>\server\modules\dataflows\siebel\sea
- For Siebel Industry Applications, go to: <SpectrumPlatformLocation>\server\modules\dataflows\siebel\sia
-
Review the following table then copy the applicable dataflow files
to:
SpectrumLocation\server\app\import
Table 1. Dataflow Files To Import If you are installing this set of modules Copy these dataflow files to the import folder Address Now Module only SiebelGetGlobalCandidateAddresses.df
ValidateAddressWithCandidates.ADN.dfAddress Now Module
Universal Addressing ModuleSiebelGetGlobalCandidateAddresses.df
ValidateAddressWithCandidates.UAM_ADN.dfAddress Now Module
Enterprise Geocoding ModuleGeocodeUSAddressWithCandidates.df
SiebelGetGlobalCandidateAddresses.df
ValidateAddressWithCandidates.EGM_ADN.dfAddress Now Module
Enterprise Geocoding Module
Universal Addressing ModuleGeocodeUSAddressWithCandidates.df
SiebelGetGlobalCandidateAddresses.df
ValidateAddressWithCandidates.UAM_EGM_ADN.dfUniversal Addressing Module only
ValidateAddressWithCandidates_UAM.df
Universal Addressing Module
Enterprise Geocoding ModuleGeocodeUSAddressWithCandidates.df
ValidateAddressWithCandidates_UAM_EGM.dfUniversal Addressing Module
Enterprise Tax ModuleGeocodeUSAddressWithCandidates.df
ValidateAssignGeoTAXInfo.df
ValidateAddressWithCandidates_UAM_ETM.dfUniversal Address Module with Loqate
ValidateAddressWithCandidates_UAM_Loqate.df
Universal Addressing Module with Loqate
Enterprise Geocoding ModuleValidateAddressWithCandidates_Loqate_EGM.df
Universal Addressing Module, Loqate only
Enterprise Geocoding ModuleValidateAddressWithCandidates_Loqate_EGM.df
Universal Addressing Module with Loqate
Enterprise Tax ModuleValidateAddressWithCandidates_UAM_Loqate_ETM.df
Universal Addressing Module with Loqate
Enterprise Geocoding Module
Enterprise Tax ModuleValidateAddressWithCandidates_UAM_Loqate_EGM_ETM.df
Universal Addressing Module, Loqate only
ValidateAddressWithCandidates_Loqate.df
Enterprise Geocoding Module ValidateAddressWithCandidates_EGM.df
Enterprise Tax Module ValidateAssignGeoTAXInfo.df
Note: If errors occur in Management Console or Enterprise Designer, delete the client cache. To delete the client cache, go to Tools > Options in Management Console or Enterprise Designer, click the Advanced tab, then click Clear Cache. After you clear the cache, restart Management Console or Enterprise Designer.
-
Browse to one of the following folders on your Spectrum™ Technology Platform server:
- Optional:
If you are using the Enterprise Geocoding Module,
configure the geocoding dataflow to use the geocoding database resource name you
have configured on your system:
- In Enterprise Designer, open the dataflow GeocodeUSAddressWithCandidates.
- In each dataflow, open the Geocode US Address stage.
-
In the Database field, select the name of the
geocoding database as defined in the Management Console. The default
name is KGDDatasource but if the geocoding database has a different name
on your system, select the appropriate name.
Note: For more information about database resources, see the Spectrum™ Technology Platform Administration Guide.
- Save and close each dataflow.
-
Copy Siebel objects to your system:
- Browse to the location where you downloaded the Spectrum™ Technology Platform installer.
-
Browse to the appropriate folder for your version of Siebel as shown in the following table.
Siebel Version Folder Siebel Business Applications 8.0 Non-SDQ Siebel Objects\8.0\Business\non SDQ Siebel Business Applications 8.1.1 Non-SDQ Siebel Objects\8.1.1\Business\non SDQ Siebel Industry Applications 8.0 Non-SDQ Siebel Objects\8.0\Industry\non SDQ Siebel Industry Applications 8.1.1 Non-SDQ Siebel Objects\8.1.1\Industry\non SDQ -
Copy the contents of the folder to a temporary directory.
Note: This temporary folder will be the referred to as <Spectrum Package> in the following steps.
-
Create objects and allow object locking:
- Log in to Siebel Tools as the user SADMIN, with the connection pointing to the server data source.
-
Go to Object Explorer, drill down to the
Project object. From the Project area,
right-click and select New Record. Create the
following projects:
- Group 1 Data Quality
- Group 1 EAI Testing
- Group 1 Workflow
- Open the file <Spectrum Package>\tools\CDQP_Queries.txt.
-
Copy and paste the query contents to the Project list of your Object Manager. Cross-check
the query result with the table below and perform the action suggested.
To toggle object locking, go to Object Explorer and browse to the
Project object. From the Project area, right-click and select the
project, and select Toggle Object Locking.
Table 2. Queries for Siebel non-SDQ Siebel Business Applications Siebel Industry Applications Open UI Project Action X X X Account Toggle Object Locking X X X Account (SCW) Toggle Object Locking X X X Account (SSE) Toggle Object Locking X X X Contact Toggle Object Locking X X X Contact (SSE) Toggle Object Locking X X CUT Account Toggle Object Locking X X CUT Siebel Communications Toggle Object Locking X X CUT Usage Toggle Object Locking X X X DNB Data Toggle Object Locking X X X DeDuplication Toggle Object Locking X X eAutomotive Toggle Object Locking X X X Employee Toggle Object Locking X X FINS Contract Toggle Object Locking X X FINS Contract Info Toggle Object Locking X X FINS Deal Commercial Toggle Object Locking X X FINS Financial Services Toggle Object Locking X X FINS Opportunity Toggle Object Locking X X X Group 1 Data Quality Create and Toggle Object Locking X X X Group 1 EAI Testing Create and Toggle Object Locking X X Group 1 Workflow Create and Toggle Object Locking X List Mgmt (Import) Toggle Object Locking X X X List Mgmt (UI) Toggle Object Locking X Mvg Toggle Object Locking X X X Oppty Toggle Object Locking X X X Oppty (SSE) Toggle Object Locking X X X Personal Contact Toggle Object Locking X X X Picklist Toggle Object Locking X X X Server Component Requests Toggle Object Locking X X Siebel Sales Enterprise Toggle Object Locking X Siebel Universal Agent Toggle Object Locking X X VERT CUT Address Toggle Object Locking X X VERT Cut Common Toggle Object Locking
-
Check out the Siebel Projects:
- Log in to Siebel Tools on Local Datasource.
- Select Tools > Checkout.
-
Select the projects indicated in the following table and click Checkout.
Table 3. Siebel Projects for non-SDQ Siebel Business Applications Siebel Industry Applications Project X X Account X X Account (SCW) X X Account (SSE) X X Contact X X Contact (SSE) X CUT Account X CUT Siebel Communications X CUT Usage X X DNB Data X X DeDuplication X eAutomotive X X Employee X FINS Contract X FINS Contract Info X FINS Deal Commercial X FINS Financial Services X FINS Opportunity X X Group 1 Data Quality X X Group 1 EAI Testing X Group 1 Workflow X List Mgmt (Import) X X List Mgmt (UI) X Mvg X X Oppty X X Oppty (SSE) X X Personal Contact X X Picklist X X Server Component Requests X Siebel Sales Enterprise X Siebel Universal Agent X VERT CUT Address X VERT Cut Common
-
Import the Spectrum™ Technology Platform Siebel objects:
- Select Tools > Import from Archive.
-
Import the Siebel SIF files located in <Spectrum Package>\sif. Select Overwrite the object definition in the repository and click Next to proceed until the import process has been completed.
- G1_NEW.sif
- G1_APPLET.sif
- G1_BO.sif
- G1_LINK.sif
- G1_BC.sif
- G1_BC_SCRIPTS.sif
- G1_EAI_TESTING.sif
- G1_APPLICATION.sif
- G1_PICKLIST.sif
- G1_VIEW.sif
- G1_WORKFLOW.sif
- (8.1.1 only) Rebranding.sif
- PB_SecToken.sifNote: PB_SecToken.sif must be imported in the end.
-
(Open UI Only) Import the Siebel SIF files located in
<Spectrum Package>\OPEN_UI. Select
Overwrite the object definition in the repository
and click Next to proceed until the import
process has been completed.
- FINS Personal Address List Applet.sif
- G1 Common Browser Scripts Service.sif
- Siebel Sales Enterprise.sif
-
Check
in all locked projects:
- Select Tools > Check In.
- Select all the Projects to check in and click Check in.
-
Compile all Projects:
- Select Tools > Compile Projects.
- Click All Projects.
- In the Siebel Repository File field, enter the path of your Siebel Web Client SRF file.
- Click Compile.
-
Update the application .CFG flie:
-
Open the appropriate .cfg file in an editor:
For example, for Siebel Business:
- Siebel Call Center—uagent.cfg
- Siebel Sales—siebel.cfg
For example, for Siebel Industry:
- eAutomotive—auto.cfg
- Financial—fins.cfg
- eCommunication—ecomm.cfg
Siebel .cfg files are usually found in the following locations:- Siebel thick client—Siebel\<version>\web client\bin\enu
- Siebel thin client—<Siebel Server>\bin\enu
-
Add the following lines under the
[SWE]section:ClientBusinessService0 = G1 Async Service ClientBusinessService1 = G1 Business Name Standardization Service ClientBusinessService2 = G1 Common Browser Scripts Service ClientBusinessService3 = G1 Common Server Scripts Service ClientBusinessService4 = G1 DNB VBC Service ClientBusinessService5 = G1 Data Cleansing Service ClientBusinessService6 = G1 DeDuplication Service ClientBusinessService7 = G1 Generate HashKey Service ClientBusinessService8 = G1 GeoCoding Service ClientBusinessService9 = G1 Interactive Service ClientBusinessService10 = G1 Merge Records Service ClientBusinessService11 = G1 Name Casing Service ClientBusinessService12 = G1WebService
-
Open the appropriate .cfg file in an editor:
-
Deploy the Siebel objects in the client:
Note: Keep a backup of the old SRF in case old binaries need to be re-implemented.
-
Copy the generated SRF to your web client objects folder.
For example, on Windows this folder may be C:\Program Files\Siebel\8.0\web client\OBJECTS\ENU. On Unix or Linux this folder may be /disk2/sia78/webclient/OBJECTS/enu/.
-
Open a command prompt and go to the BIN folder of the web client.
For example, on Windows this folder may be C:\Program Files\Siebel\8.0\web client\BIN. On Unix or Linux, this folder may be /disk2/sia80/webclient/BIN.
-
Generate browser scripts by issuing this command:
On Windows:
genbscript "ENU\siebel.cfg" "[public\enu
								folder]"
On Unix or Linux:
genbscript [location of .cfg] [public/enu
								folder]
For example, on Windows:
C:\Program Files\Siebel\8.0\web client\BIN>genbscript
								"enu\siebel.cfg" "C:\Program Files\Siebel\8.0\web
								client\PUBLIC\enu"
On Unix or Linux:
genbscript /disk2/sia80/webclient/BIN/enu/siebel.cfg sia80/webclient/PUBLIC/enu - Copy g1_check.gif and g1_x.gif from the temporary folder to public\enu\images in the Siebel web client.
- Copy the contents of <Spectrum Package>\dll to your BIN folder.
- Copy the contents of <Spectrum Package>\cfg to your BIN/ENU folder.
-
Copy the generated SRF to your web client objects folder.
-
Deploy the Siebel objects to the server:
- Stop the Siebel server.
-
Copy the generated SRF file to your web client objects folder.
For example, the folder for Siebel Business on Windows may be C:\sea80\siebsrvr\OBJECTS\ENU. On Unix or Linux the folder may be /disk2/sea80/siebsrvr/OBJECTS/enu/.
-
Open a command prompt and go to the BIN drive of the web client.
For example, on Windows this folder may be C:\sia80\siebsrvr\BIN. On Unix or Linux this folder may be /disk2/sea80/siebsrvr/BIN.
-
Generate browser scripts by issuing this command:
On Windows:
genbscript "ENU\siebel.cfg" "[webmaster folder]"On Unix or Linux:
genbscript [location of Siebel.cfg] [webmaster
								folder]
For example, on Windows:
C:\sia80\siebsrvr\BIN>genbscript "enu\siebel.cfg"
								"C:\sia80\siebsrvr\WEBMASTER"
For example, on Unix or Linux:
genbscript /disk2/sea80/siebsrvr/BIN/enu/siebel.cfg /disk2/sea80/siebsrvr/WEBMASTER/ -
Copy g1_check.gif and g1_x.gif from the
temporary folder to the following folder on the Siebel sever.
On Windows:
public\enu\images
On Unix or Linux:
WEBMASTER/images/enu
Note: For Siebel Thin Client, copy g1_check.gif and g1_x.gif from the temporary directory to SWEApp/PUBLIC/enu/images. - Copy the generated browser scripts from /WEBMASTER to <SWEApp Location>/public/ENU.
- Start the Siebel server.
-
Activate the Spectrum™ Technology Platform workflows in the Siebel web client:
- Log in to the Siebel application, connecting to the server data source.
- Select Site Map > Administration - Business Process > Workflow Deployment.
- Query for all the GROUP 1* workflows.
- Click Activate for each workflow.
- Query for all the Promote* workflows.
- Click Activate for the ff workflows Promote Prospect (Single) and Promote Prospect (Many).
- Click Import Process in the Menu option in the Active Workflow Process screen. Specify the file <Spectrum Package>\workflows\PB Token WS Workflow.xml.
-
Load the Group 1 configuration.
- Log in to the Siebel application connecting to the server data source.
- Go to Site Map > Administration - Business Service > Simulator.
-
In the top applet, create a new record and set the following fields:
Service Name Workflow Process Manager Method Name Run Process Iterations 1 -
In the Input Arguments applet, load:
<Spectrum Package>\tools\OptionsManagerLoadData.xml
Note: Delete the entry if previous GROUP 1 options already exist in the database. Run the following SQL Script:DELETE SIEBEL.S_LST_OF_VAL WHERE CODE = 'G1' - Click Run in the top applet of the Simulator view. Delete the record.
-
Repeat steps c. and d. for the ff files:
- ViewAccessLoadData.xml
- AdminAccessLoadData.xml
- Go to Site Map > Administration - Application > Responsibilities:
- Query for the responsibility Group 1 Responsibility.
-
In the Users tab, add SADMIN or any Siebel administrator. This associates the Group 1 Administration Screen to the user.
Note: In order to see the changes you must log-in again.
- Go to Site Map > Administration - Group 1 Data Quality > Options Manager > General Behavior.
- Change the server and port number where the Spectrum™ Technology Platform server is located.
-
Verify the installation:
- Log in to Siebel Application.
- All applets should load properly without error.
-
Modify and apply web services.
- Go to Site Map > Administration - Web Services > Outbound Web Services.
- Click Import on the Outbound Web Services area and then specify the file <Spectrum Package>\webservices\G1WebService.xml.
-
Query on the Name field ValidateAddress, and modify its settings as follows:
On the Service Port applet, change the following fields:
- Transport: Local Business Service
- Address: G1 WebService Filter Service
On the Operations applet, change the following fields:
- Response Filter Service Display: G1 WebService Filter Service
- Response Filter Method Display: filter Response
- Click Import on the Outbound Web Services area and then specify the file <Spectrum Package>\webservices\TokenManagerServiceImplService.xml.
-
Encrypt and apply Spectrum™ Technology Platform user name and password.
-
Run the following command on the command prompt:
java -versionJava Runtime Environment (JRE) 1.4.x is required. If none is installed, you can download from java.sun.com/j2se/1.4.2/download.html. Download the JRE of your target platform.
- Acquire the file <Spectrum Package>\tools\Base64.class.
-
On the command prompt, type the following command:
java Base64 -encode -s "<username>:<password>"where <username> and <password> is to the login information of Spectrum™ Technology Platform server. Copy the generated value.
Note: The default Spectrum™ Technology Platform password can be found in <Spectrum Package>\tools\Default Password.txt. - Go to Site Map > Administration - Group 1 Data Quality > Password Manager. Paste the value generated in step c. and click Save Changes.
-
Run the following command on the command prompt:
-
Configure Siebel server configuration events.
The Siebel server must be configured so that the records created in the local database can be synchronized to the server.
- Navigate to View > Administration - Server Configuration > Servers > Components > Event.
- Locate the Workflow Process Manager Server components.
-
Set the following Component Event Configuration for Workflow Process Manager:
Task Configuration 4 Component Tracing 3 SQL Parse and Execute 4 Workflow Definition Loading 4 Workflow Engine Invoked 4 Workflow Step Execution 4 Workflow Process Execution 4 Object Manager Business Service Operation and SetErrorMsg Log 4 Object Manager Business Component Operation and SetErrorMsg Log 4 Object Manager SQL Log 4 - Locate the Transaction Merger server components.
-
Set the following Component Event Configuration for Transaction Merger:
General Events 4 Components Tracing 3 SQL Parse and Execute 4
-
Enable marketing server components.
The Marketing Server Components must be enabled to import a list from the List Management business object.
- Navigate to Administration - Server Configuration > Enterprises > Component Groups.
- In the Spectrum™ Technology Platform Server list, select the appropriate server.
-
In the Enterprise Component Groups list, locate each of the required component groups using the following table. If the Enable State field does not contain the value Enabled, select the component groups, click the menu button, and choose Enable Component Group.
Group Name Components Description MktgOM - Marketing Obj Mgr
- eMarketing Obj Mgr
- eEvents Obj Mjr
Marketing Object Manager. Supports the user interface and business objects for the Marketing application. Mktg Srv List Import Service Manager Marketing Server. Used for list management list import. - Click the Synchronize view tab and click Synchronize.
- Restart the Siebel server. The Siebel server must be restarted each time synchronization occurs.
-
(Open UI Only) Grant the EAI File Transport business service access to the file
system by following these steps.
- Click Navigate > Site Map.
- Click Administration - Server Configuration.
- In the Administration - Server Configuration section, under Enterprises, click Parameters.
- Click Query.
- In the Name column, enter EAI File Transport Folder List.
- Click Go.
- In the Value column, enter the root of the drive where you have Siebel installed. For example, C:\.
-
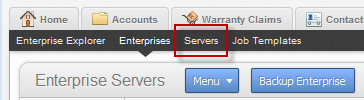
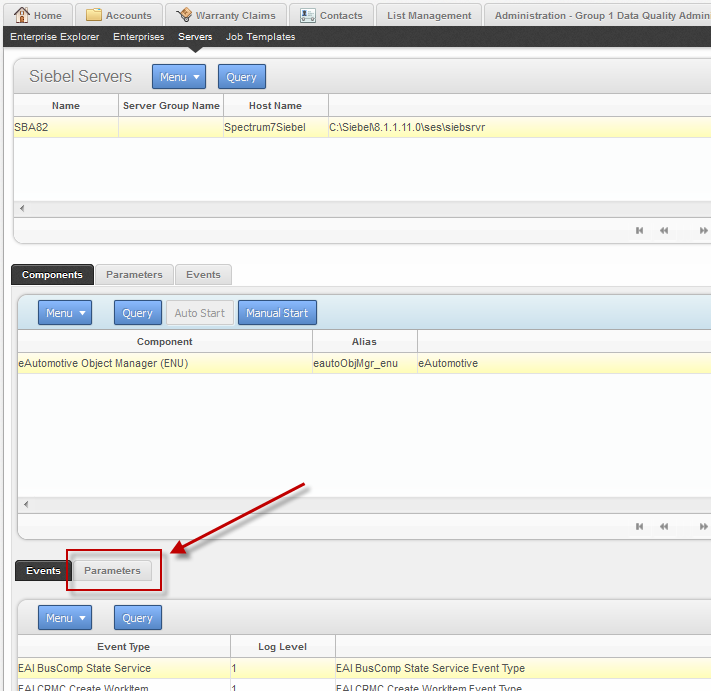
Click the Servers link:
-
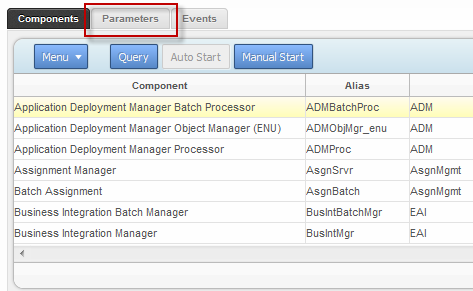
Click the Parameters tab:
- Click Query.
- In the Name column, enter EAI File Transport Folder List.
- Click Go.
- In the Value column, enter the root of the drive where you have Siebel installed. For example, C:\.
-
Add the following values to the .cfg file appropriate for your
system (for example, auto.cfg,
tools.cfg, and so on).
[EAIFileTransportConfigSubsys] EAIFileTransportFolders=C:\ - Restart the Siebel server and gateway.
-
Set the EditProfileAttr parameter:
- Click Navigate > Site Map
- Click Administration - Server Configuration.
- In the Administration - Server Configuration section, under Servers, click Components.
- On the Components tab, click Query.
- In the Component column, enter the name of the Object Manager component. For example, "eAutomotive Object Manager".
- Click Go.
-
Click the Parameters tab at the bottom of the
window.
- Scroll to the parameter EditProfileAttr.
- Enter True in the Value, Value on Restart, and Default Value columns.
You have now configured Siebel non-SDQ to use Spectrum™ Technology Platform for data quality processing.